

Agent Instructions
Write, save, and publish Cintesa Agent Instructions, including @ references to sections, UI blocks, tools, media, and links.
Last updated on
Open Agent Instructions. This is workflow step 5.
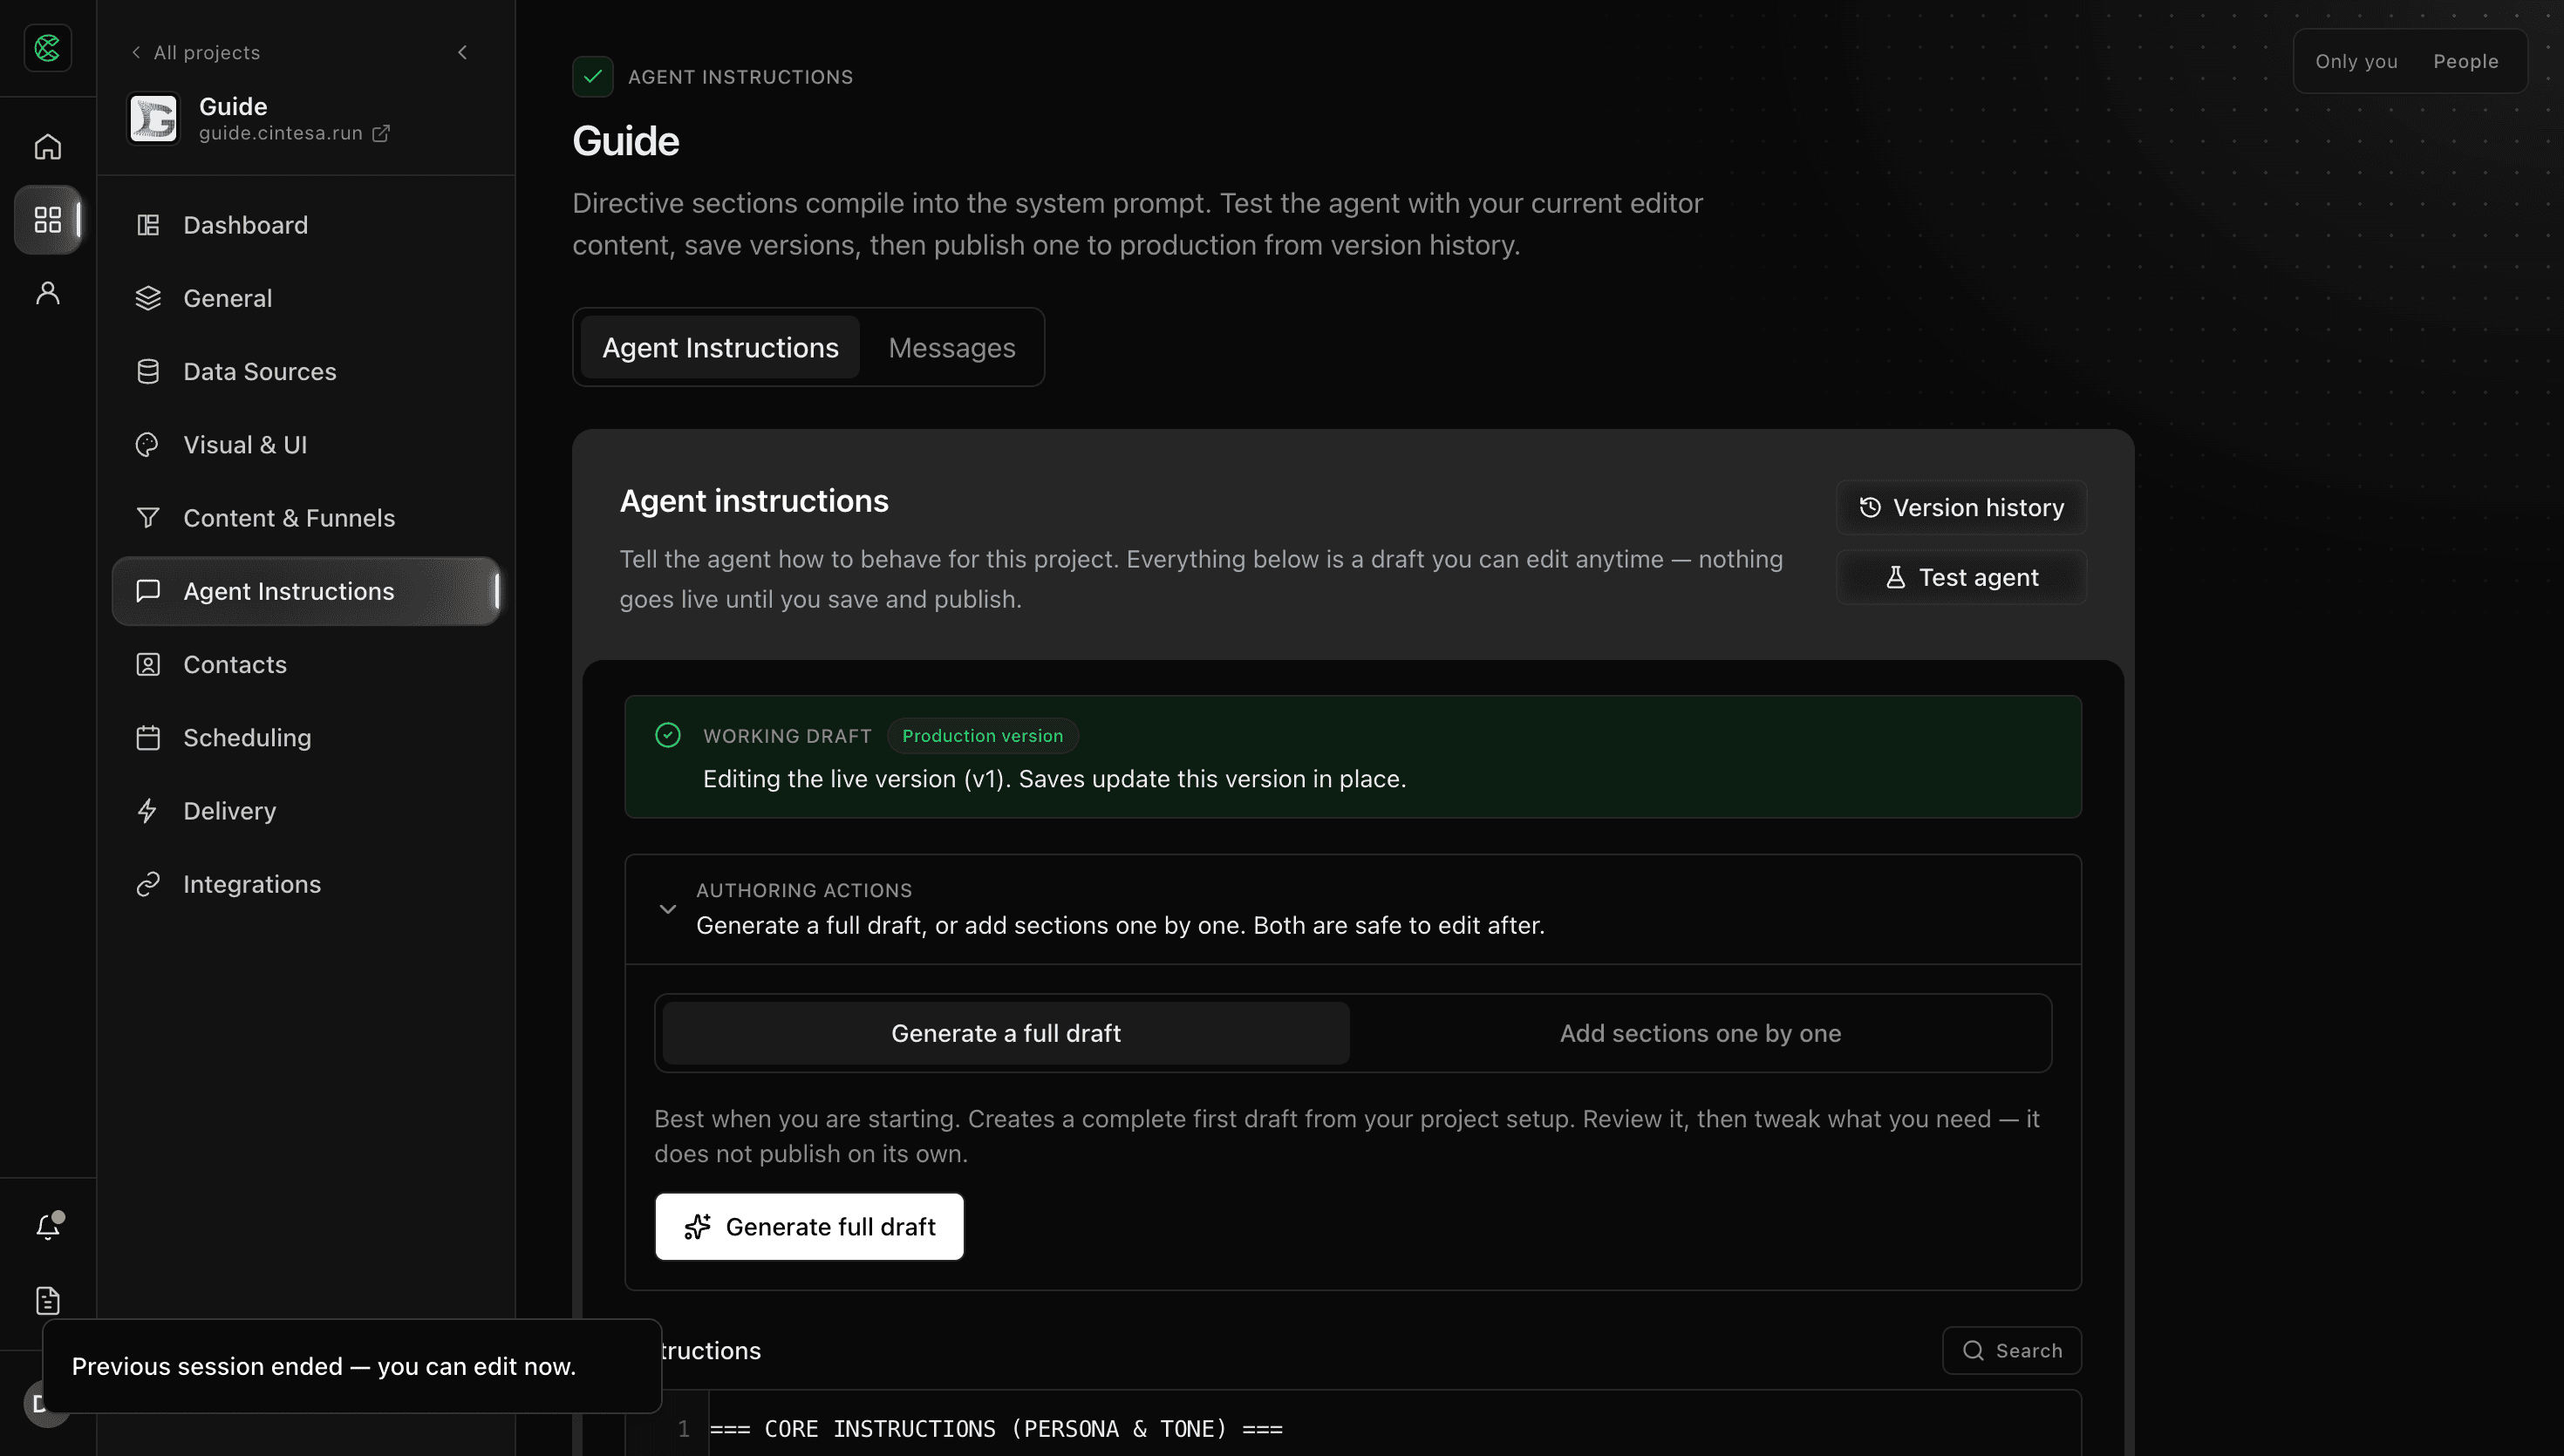
Write and save
- Describe how the agent should greet, what it may promise, and when to offer a form, booking, or human handoff. Authoring actions has two tabs: Generate a full draft (from project setup) and Add sections one by one (insert a ready-made piece).
- Save creates the first version automatically. After that save, test the agent and Publish from version history. One saved version is enough to move the workflow; Publish completes the step and is what visitors get. Later edits can Save in place or Save as new version.
Unpublished drafts do not change the live site.
The Messages tab holds fallback, handoff, input disclaimer, and returning-visitor copy. Changing Enable returning visitor experience shows Save messages.
Plan-related feature. Generate draft (AI instructions) is available on Pro or higher (AI content generation). On Basic and Starter you write instructions yourself; generate uses a limited fallback and the dashboard shows an upgrade notice. Instruction insights (suggestions from recent conversation logs) is available on Agency or higher. See Plans.
What belongs here
Persona, reply shape, pricing you want stated, demo links, and any intent-specific answers belong in these instructions (and in ingested pages). Do not expect the platform to hardcode a tenant’s product story.
Platform references
The editor can link a sentence to a real platform object. Type @ and pick from the project’s published sections, media, UI blocks, and tools. You can also paste a full https:// link. The footer under the editor is the color legend for those tokens.
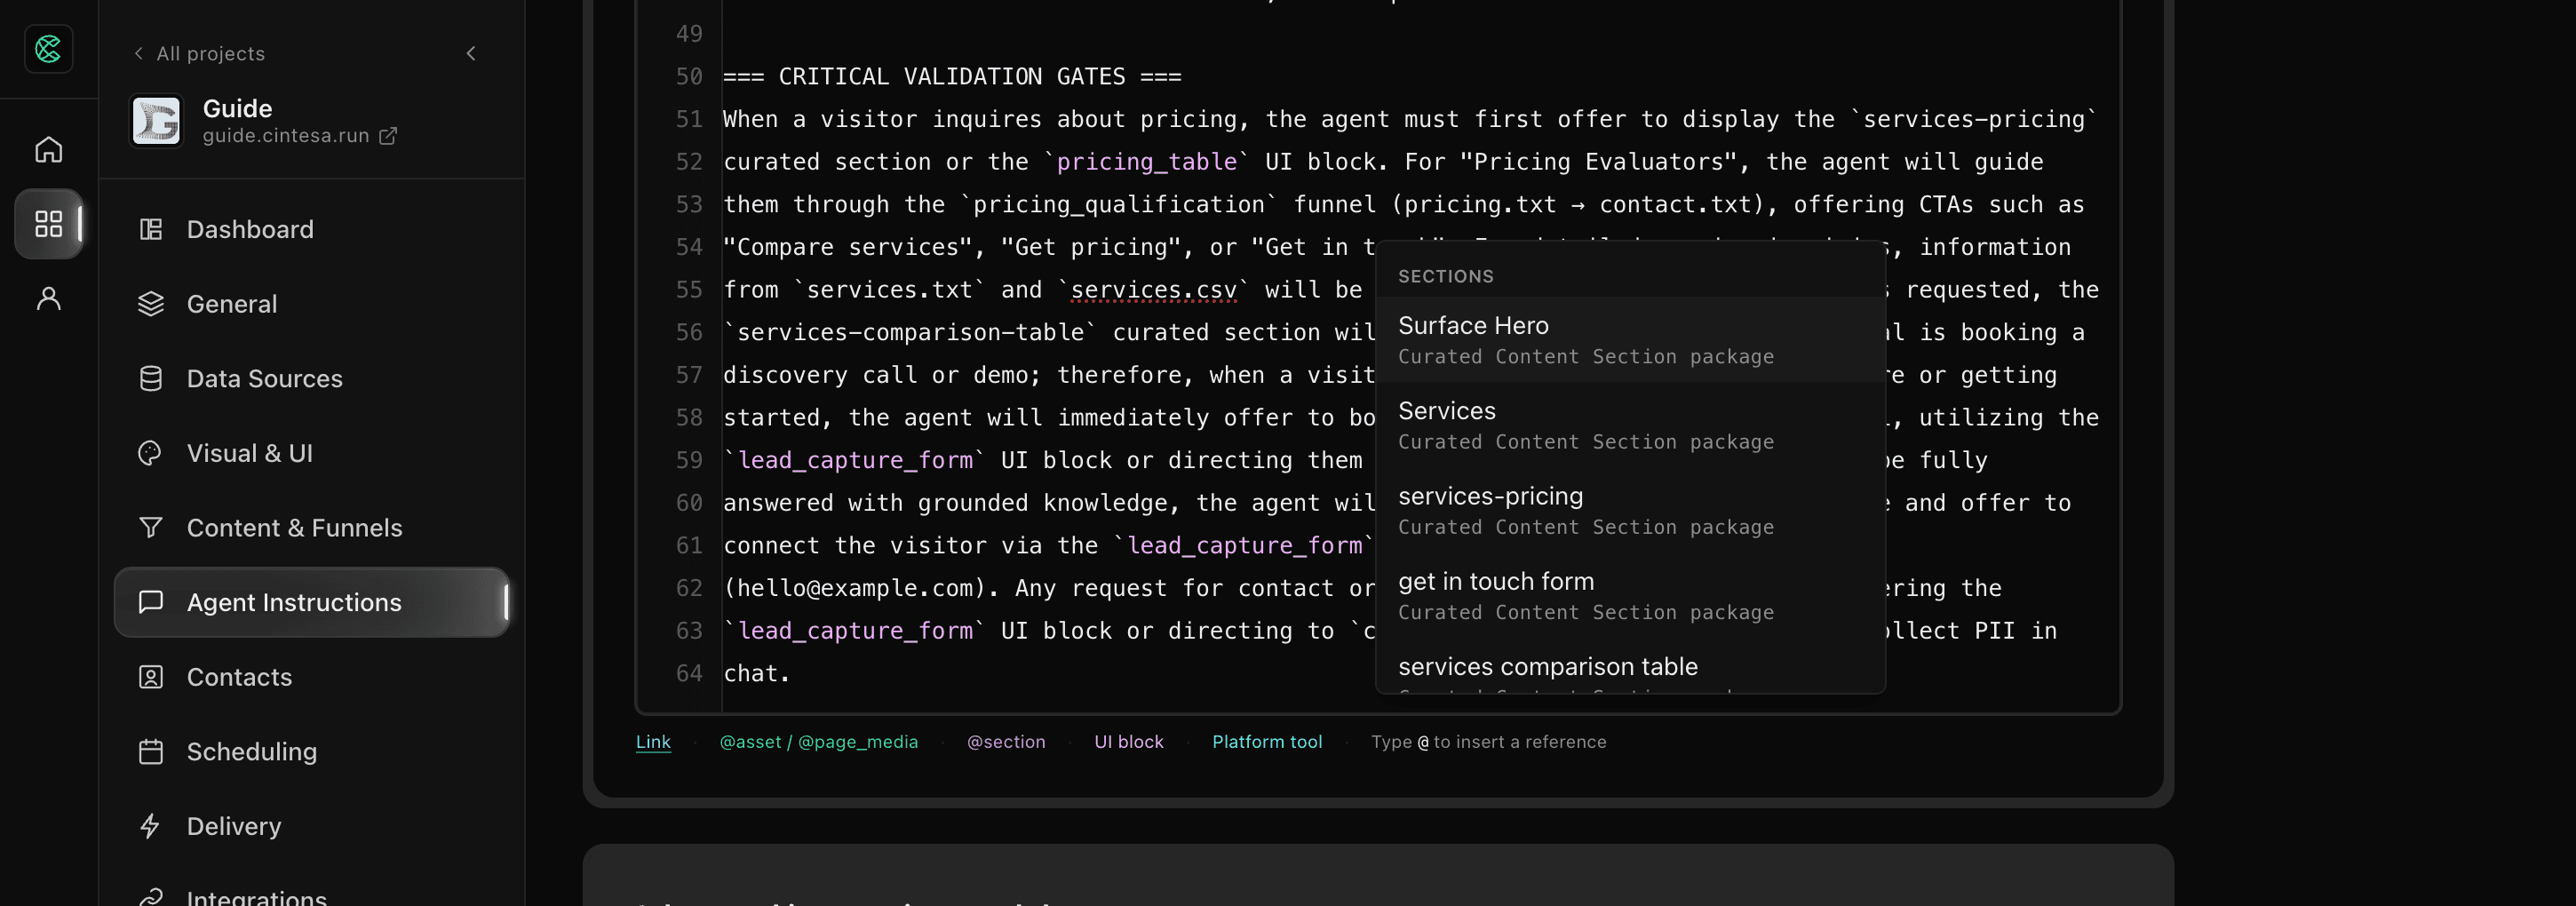
Use references when you want the agent to show a specific Content Section, compose a specific UI-block shape, attach a library image, or call a connected tool. Pick from the menu so the spelling matches the published object. Do not invent tags.
How to insert a reference
- Click in the instructions editor.
- Type
@. A menu opens, grouped as Sections, Media, UI blocks, and Platform tools. - Filter by typing a name or tag, then choose the row. The editor inserts the exact token.
- For a public URL, paste the full
https://address. The editor highlights it as a link. - After you insert a section token, confirm the tag against Content & Funnels → Content sections. The published tag is the source of truth.
The menu only lists objects this project already has. A section appears after you save it. Media appears after you upload or ingest it. Connected tools appear when that integration is on.
Do not leave raw tokens in anything the visitor should read. Visitors see the rendered section, block, or image — not @page_section:….
Color codes
Each kind of reference uses one color in the editor. The same colors appear in the footer legend.
| Kind | What it marks |
|---|---|
| Link | A full http:// or https:// URL |
| Media | @asset_… brand files and @page_media_… ingested page media |
| Section | @page_section:<tag> (the picker). @section:<tag> also highlights |
| UI block | @ui-block:<id> and the matching block name |
| Platform tool | A connected tool the @ menu inserts |
| Placeholder | A template field such as {{businessName}} |
Name convention
Write tokens exactly. The picker inserts the legal form. Hand-typed tokens must match the same pattern or they stay plain text.
| Kind | Write it as | Allowed characters | Example |
|---|---|---|---|
| Section | @page_section:<tag> | Tag: lowercase letters, numbers, and hyphens; 1–50 characters. No capitals, spaces, or underscores | @page_section:works-gallery |
| Section (legacy highlight) | @section:<tag> | Same tag rules. Prefer @page_section: from the menu | @section:welcome |
| Brand media | @asset_<slug> | After the prefix: lowercase letters, numbers, and underscores; 1–48 characters | @asset_logo |
| Page media | @page_media_<slug> | Same slug rules as brand media | @page_media_hero |
| UI block | @ui-block:<id> | Catalog id in snake_case (lowercase letters, numbers, underscores) | @ui-block:lead_capture_form |
| Platform tool | The name the @ menu inserts | Use the picker so the spelling matches | Slack live chat, calendar, HubSpot — when connected |
| Link | Full URL | Must start with http:// or https:// | https://www.example.com/pricing |
| Placeholder | {{camelCaseKey}} | Letters only inside the braces | {{businessName}} |
Section tags come from Content & Funnels. If the section is Works gallery with tag works-gallery, the token is @page_section:works-gallery — not @page_section:Works_Gallery.
Media tags come from the brand library or ingested page media. Do not invent a slug. Do not paste image URLs when a tag exists; tell the agent to use that tag on the image field.
UI-block ids are the library names, for example @ui-block:free_text, @ui-block:cta_buttons, @ui-block:lead_capture_form, @ui-block:appointment_scheduler, @ui-block:pricing_table. Type @ and pick the block instead of guessing.
Name a platform action when this project has that capability. Type @ and pick the tool from Platform tools instead of guessing a name:
- Compose a library UI block
- Slack (when connected): start live chat, or request approval
- Calendar (when connected): create an event
- HubSpot (when connected): find a contact, get contact context, log a note, or update a deal stage
Connect tools on Agent tools. Instructions decide when to call them. The platform does not invent a handoff, booking, or CRM action from a keyword.
Placeholders appear in Add sections one by one templates. Fill company name, domain, and similar fields under General, or replace the {{…}} text yourself before you publish.
When to use each kind
| Use | Token | Result |
|---|---|---|
| Show a package you already designed | @page_section:<tag> | Renders that Content Section exactly as saved |
| Compose a library shape from this project’s content | @ui-block:<id> | Builds that block and fills it from instructions and ingested content |
| Attach a library image | @asset_… or @page_media_… | Use the tag on the image field — do not invent a URL |
| Name a platform action | Tool name | The agent may call that tool when your instructions say to |
| Share a public page | https://… | A highlighted link the agent can offer |
Choose @page_section: when the layout and copy already live in Content & Funnels (a gallery, a bio, a survey, a booking section). Choose @ui-block: when you want that shape filled for this turn. Do not mix a made-up section tag with a UI-block id.
After publish
Change copy, save a new version, and publish again. Preview after each publish — see Preview.
© 2026 Cintesa. Guide text and screenshots are Cintesa product materials for personal and operator use. Do not scrape or republish them commercially without permission. Terms of Service · Privacy Policy.